i am trying to setup Port Forwarding on an ATT BGW210, i Have followed all the instructions but still will not work, am i doing something wrong??
Can you provide screen shots of your port forwarding setup from the router admin page for port forwarding, and Tablo Remote Connect page section (http://my.tablotv.com)?
Found an article with step by step instructions:
Here’s the user’s, terry314159, excerpt:
I was successful in getting port forwarding setup up on on my BTW210-700 my Tablo server.
-
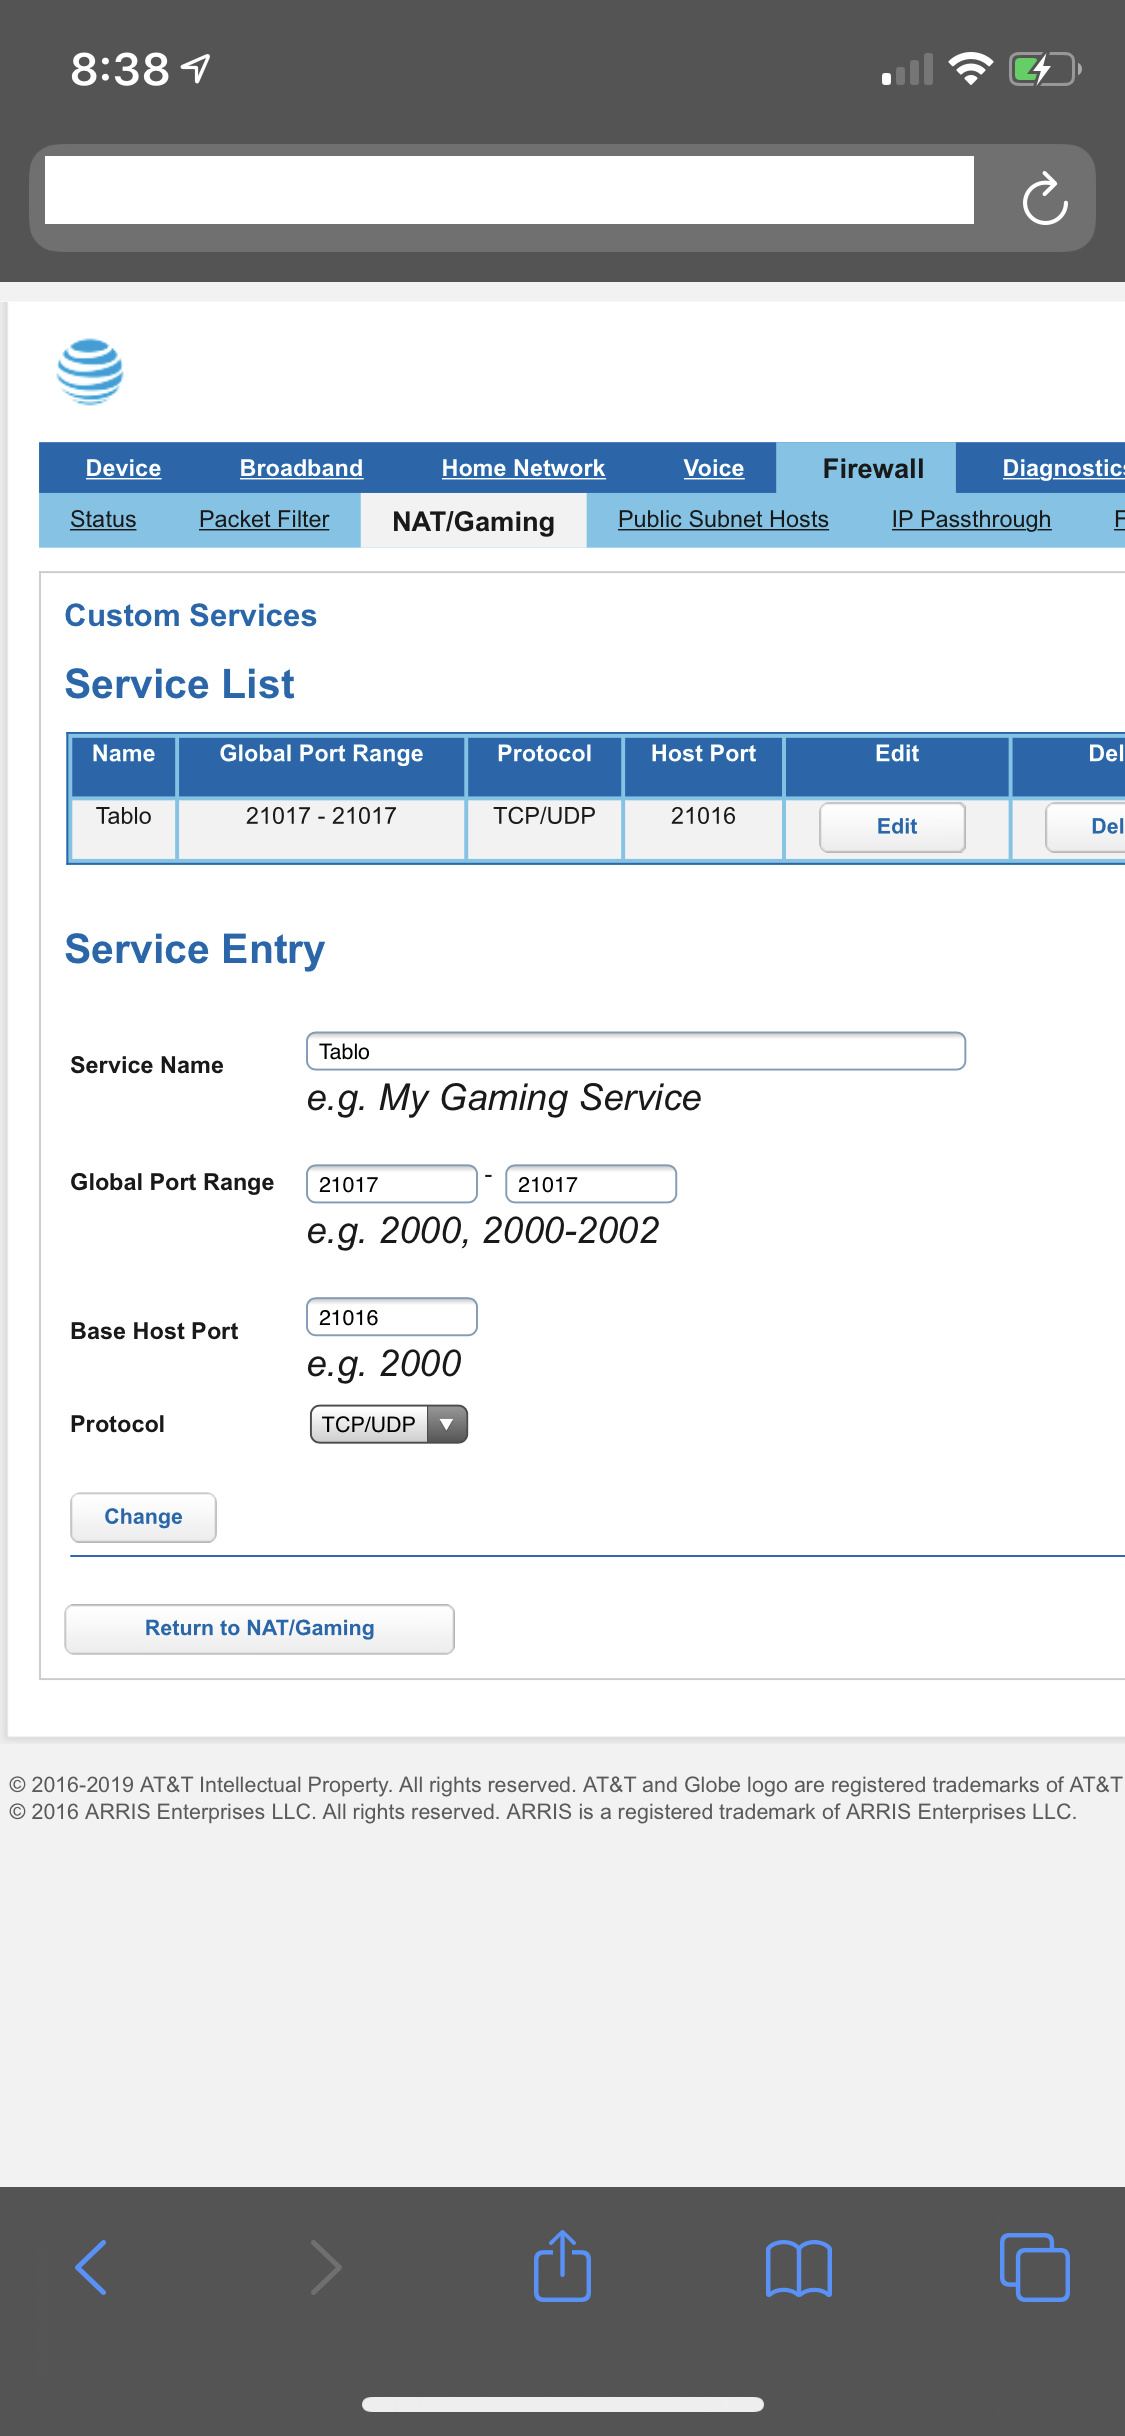
Under NAT/Gaming, go to Custom Services. Here you will enter any of the Public Ports that your application requires. You may also need to open any private ports that the BTW210 does not already have open as default. Typically, you should not need to open any private ports. First, under Service Name, enter something that makes sense to your application, like Tablo1. Under Global Port Range, enter the public port number in both spots; I.e.; 21000-21000. Leave the Base Host Port blank. Under ‘Protocol’, choose the one your application needs, typically TCP/UDP. Click Add
-
Now enter any additional ports you want to open one at a time just as in step 1. Use a different name for each on; I.e; Tablo2, Tablo3, etc.
-
Click ‘Return to NAT/Gaming’.
-
The first Service Name (Tablo1) that you created will now show up under ‘Service’. Under ‘Needed by Device’, choose the device that needs this port from the list. Click Add.
-
The next Service Name (Tablo2) that you created will now show up under ‘Service’. Under ‘Needed by Device’, chose the same device that needs this port from the list. Click ‘Add’.
-
Repeat for all the Service Names you created to add all the ports to your device.
-
Now go to the ‘IP Passthrough’ tab. Under ‘Allocation Mode’, choose ‘Passthrough’.
-
For ‘Default Server Internal Address’, enter the local IP address of your device that needs the forwarded ports; I.e.;192.168.1.67
-
For ‘Passthrough Mode’, chose ‘DHCPS-Fixed’.
-
For ‘Passthrough Fixed MAC Address’, under ‘Device List’, choose ‘Choose from List’.
-
For ‘Passthrough Fixed MAC Address’, under ‘Manual Entry’, center the MAC adress of your device needing the ports. This IP address can be found under the ‘Device’, ‘Device List’ tab.
-
Go to ‘Device’ tab, ‘Restart Device’ tab and click ‘Restart’.
-
After the router restarts, go to the the ‘Firewall’ tab, ‘NAT/Gaming’ tab. You new Service Names should appear showing the Ports and should say ‘Passthrough’ in the ‘Device’ column.
-
You should now be good to go with that devices information forwarded on a pass-through basis from the private ports (I.e; 80) to the public ports you just created. Good luck!